今天分享一下 springboot mybatis-plus 和 druid 的yml 配置文件。
pom
<dependency> <groupId>org.springframework.boot</groupId> <artifactId>spring-boot-starter-web</artifactId> </dependency> <!-- druid --> <dependency> <groupId>com.alibaba</groupId> <artifactId>druid-spring-boot-starter</artifactId> <version>1.2.4</version> </dependency> <!-- druid --> <!-- mysql --> <dependency> <groupId>mysql</groupId> <artifactId>mysql-connector-java</artifactId> <scope>runtime</scope> </dependency> <!-- mysql --> <!-- mybatis-plus --> <dependency> <groupId>com.baomidou</groupId> <artifactId>mybatis-plus-boot-starter</artifactId> <version>3.4.1</version> </dependency> <!-- mybatis-plus --> <!-- mybatis-plus-generator --> <dependency> <groupId>com.baomidou</groupId> <artifactId>mybatis-plus-generator</artifactId> <version>3.4.1</version> </dependency> <dependency> <groupId>org.apache.velocity</groupId> <artifactId>velocity-engine-core</artifactId> <version>2.1</version> </dependency> <!-- mybatis-plus-generator -->配置
mybatis-plus 官方配置:
https://baomidou.com/config/#%E5%9F%BA%E6%9C%AC%E9%85%8D%E7%BD%AE
druid 官方配置:
https://druid.apache.org/docs/latest/configuration/index.html
application.yml:
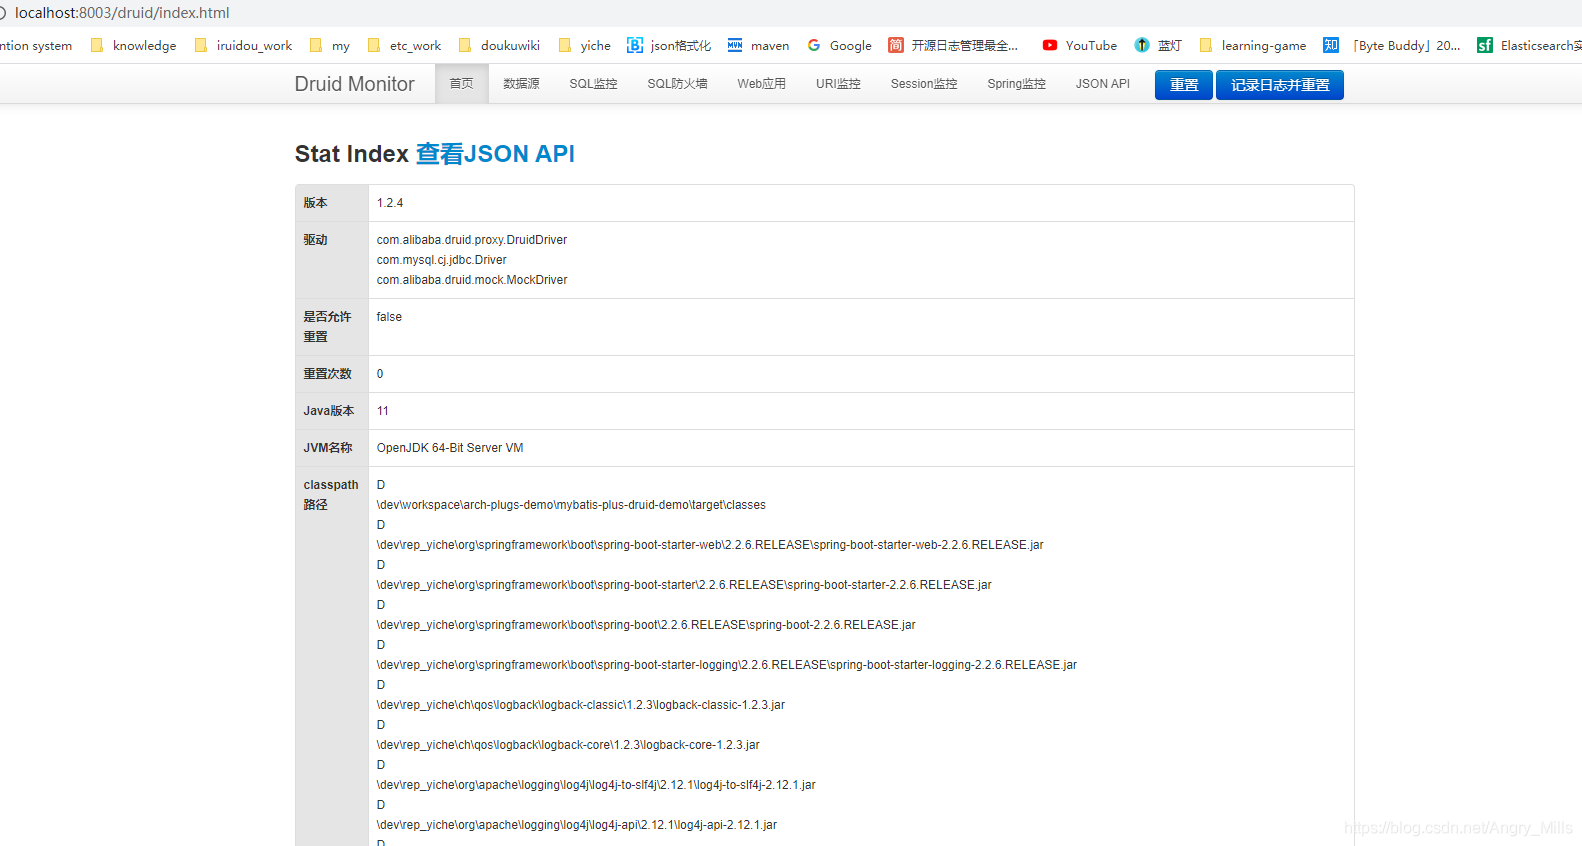
server: port: 8003 servlet: context-path: / spring: application: name: mybatis-plus-druid-demo # 应用名称 datasource: type: com.alibaba.druid.pool.DruidDataSource url: jdbc:mysql://127.0.0.1:3306/demo?characterEncoding=UTF-8&serverTimezone=Asia/Shanghai&autoReconnect=true&failOverReadOnly=false&zeroDateTimeBehavior=convertToNull&useSSL=false username: root password: root driverClassName: com.mysql.jdbc.Driver druid: # 连接池的配置信息 # 初始化时建立物理连接的个数 initial-size: 3 # 连接池最小连接数 min-idle: 3 # 连接池最大连接数 max-active: 20 # 获取连接时最大等待时间,单位毫秒 max-wait: 60000 # 申请连接的时候检测,如果空闲时间大于timeBetweenEvictionRunsMillis,执行validationQuery检测连接是否有效。 test-while-idle: true # 既作为检测的间隔时间又作为testWhileIdel执行的依据 time-between-connect-error-millis: 60000 # 销毁线程时检测当前连接的最后活动时间和当前时间差大于该值时,关闭当前连接 min-evictable-idle-time-millis: 30000 # 用来检测连接是否有效的sql 必须是一个查询语句 # mysql中为 select 'x' # oracle中为 select 1 from dual validation-query: select 'x' # 申请连接时会执行validationQuery检测连接是否有效,开启会降低性能,默认为true test-on-borrow: false # 归还连接时会执行validationQuery检测连接是否有效,开启会降低性能,默认为true test-on-return: false # 是否缓存preparedStatement,mysql5.5+建议开启 pool-prepared-statements: true # 当值大于0时poolPreparedStatements会自动修改为true max-pool-prepared-statement-per-connection-size: 20 # 合并多个DruidDataSource的监控数据 use-global-data-source-stat: false # 配置扩展插件 filters: stat,wall,slf4j # 通过connectProperties属性来打开mergeSql功能;慢SQL记录 connect-properties: druid.stat.mergeSql=true;druid.stat.slowSqlMillis=5000 # 定时输出统计信息到日志中,并每次输出日志会导致清零(reset)连接池相关的计数器。 time-between-log-stats-millis: 300000 # 配置DruidStatFilter web-stat-filter: enabled: true url-pattern: '/*' exclusions: '*.js,*.gif,*.jpg,*.bmp,*.png,*.css,*.ico,/druid/*' # 配置DruidStatViewServlet stat-view-servlet: # 是否启用StatViewServlet(监控页面)默认值为false(考虑到安全问题默认并未启动,如需启用建议设置密码或白名单以保障安全) enabled: true url-pattern: '/druid/*' # IP白名单(没有配置或者为空,则允许所有访问) allow: 127.0.0.1,192.168.0.1 # IP黑名单 (存在共同时,deny优先于allow) deny: 192.168.0.128 # 禁用HTML页面上的“Reset All”功能 reset-enable: false # 登录名 login-username: root # 登录密码 login-password: root mybatis-plus: #MyBatis Mapper 所对应的 XML 文件位置 mapperLocations: #MyBatis 配置文件位置 configLocation: #MyBaits 别名包扫描路径 typeAliasesPackage: #该配置请和 typeAliasesPackage 一起使用,如果配置了该属性,则仅仅会扫描路径下以该类作为父类的域对象 typeAliasesSuperType: #TypeHandler 扫描路径,如果配置了该属性,SqlSessionFactoryBean 会把该包下面的类注册为对应的 TypeHandler typeHandlersPackage: #枚举类 扫描路径,如果配置了该属性,会将路径下的枚举类进行注入,让实体类字段能够简单快捷的使用枚举属性 typeEnumsPackage: #Spring Boot Only,启动时是否检查 MyBatis XML 文件的存在,默认不检查 checkConfigLocation: false #Spring Boot Only,指定执行器 #ExecutorType.SIMPLE:该执行器类型不做特殊的事情,为每个语句的执行创建一个新的预处理语句(PreparedStatement) #ExecutorType.REUSE:该执行器类型会复用预处理语句(PreparedStatement) #ExecutorType.BATCH:该执行器类型会批量执行所有的更新语句 executorType: #指定外部化 MyBatis Properties 配置,通过该配置可以抽离配置,实现不同环境的配置部署 configurationProperties: #原生 MyBatis 所支持的配置 configuration: #默认false,是否开启自动驼峰命名规则(camel case)映射,即从经典数据库列名 A_COLUMN(下划线命名) 到经典 Java 属性名 aColumn(驼峰命名) 的类似映射 mapUnderscoreToCamelCase: false #默认枚举处理类,如果配置了该属性,枚举将统一使用指定处理器进行处理 #org.apache.ibatis.type.EnumTypeHandler : 存储枚举的名称 #org.apache.ibatis.type.EnumOrdinalTypeHandler : 存储枚举的索引 #com.baomidou.mybatisplus.extension.handlers.MybatisEnumTypeHandler : 枚举类需要实现IEnum接口或字段标记@EnumValue注解.(3.1.2以下版本为EnumTypeHandler) defaultEnumTypeHandler: #当设置为 true 的时候,懒加载的对象可能被任何懒属性全部加载,否则,每个属性都按需加载。需要和 lazyLoadingEnabled 一起使用。 aggressiveLazyLoading: true #MyBatis 自动映射策略,通过该配置可指定 MyBatis 是否并且如何来自动映射数据表字段与对象的属性,总共有 3 种可选值: #AutoMappingBehavior.NONE:不启用自动映射 #AutoMappingBehavior.PARTIAL:只对非嵌套的 resultMap 进行自动映射 #AutoMappingBehavior.FULL:对所有的 resultMap 都进行自动映射 autoMappingBehavior: #MyBatis 自动映射时未知列或未知属性处理策略,通过该配置可指定 MyBatis 在自动映射过程中遇到未知列或者未知属性时如何处理,总共有 3 种可选值: #AutoMappingUnknownColumnBehavior.NONE:不做任何处理 (默认值) #AutoMappingUnknownColumnBehavior.WARNING:以日志的形式打印相关警告信息 #AutoMappingUnknownColumnBehavior.FAILING:当作映射失败处理,并抛出异常和详细信息 autoMappingUnknownColumnBehavior: #Mybatis一级缓存,默认为 SESSION。(微服务架构中需要关闭一级缓存) #SESSION session级别缓存,同一个session相同查询语句不会再次查询数据库 #STATEMENT 关闭一级缓存 localCacheScope: #开启Mybatis二级缓存,默认为 true cacheEnabled: true #指定当结果集中值为 null 的时候是否调用映射对象的 Setter(Map 对象时为 put)方法,通常运用于有 Map.keySet() 依赖或 null 值初始化的情况。 callSettersOnNulls: true #指定一个提供 Configuration 实例的工厂类。该工厂生产的实例将用来加载已经被反序列化对象的懒加载属性值,其必须包含一个签名方法static Configuration getConfiguration()。(从 3.2.3 版本开始) configurationFactory: global-config: #是否控制台 print mybatis-plus 的 LOGO banner: false #是否初始化 SqlRunner(com.baomidou.mybatisplus.extension.toolkit.SqlRunner) enableSqlRunner: false #类型:Class #默认值:com.baomidou.mybatisplus.core.mapper.Mapper.class #通用Mapper父类(影响sqlInjector,只有这个的子类的 mapper 才会注入 sqlInjector 内的 method) superMapperClass: #metaObjectHandler: 3.0开始废除此属性,请使用@Bean的方式注入至Spring容器: #sqlInjector: 3.0开始废除此属性,请使用@Bean的方式注入至Spring容器 #identifierGenerator: 废弃 db-config: #全局默认主键类型 #类型:com.baomidou.mybatisplus.annotation.IdType #默认值:ASSIGN_ID idType: #表名前缀 tablePrefix: #schema schema: #字段 format,例: %s,(对主键无效) columnFormat: #entity 的字段(property)的 format,只有在 column as property 这种情况下生效例: %s,(对主键无效) propertyFormat: #表名是否使用驼峰转下划线命名,只对表名生效 tableUnderline: #大写命名,对表名和字段名均生效 capitalMode: #表主键生成器(starter 下支持@bean注入) keyGenerator: #全局的entity的逻辑删除字段属性名,(逻辑删除下有效) logicDeleteField: #逻辑已删除值,(逻辑删除下有效) logicDeleteValue: #逻辑未删除值,(逻辑删除下有效) logicNotDeleteValue: #类型:com.baomidou.mybatisplus.annotation.FieldStrategy #默认值:NOT_NULL #字段验证策略之 insert,在 insert 的时候的字段验证策略 insertStrategy: #类型:com.baomidou.mybatisplus.annotation.FieldStrategy #默认值:NOT_NULL #字段验证策略之 update,在 update 的时候的字段验证策略 updateStrategy: #类型:com.baomidou.mybatisplus.annotation.FieldStrategy #默认值:NOT_NULL #字段验证策略之 select,在 select 的时候的字段验证策略既 wrapper 根据内部 entity 生成的 where 条件 selectStrategy:druid控制台
访问 localhost:8003/druid,用户名密码是配置文件里的 root/root,能看到服务的信息,sql 监控等等
mybatis-plus 代码生成
copy到项目目录下,运行main方法即可
class GenCode { public static void main(String[] args) { String projectName = "mybatis-plus-druid-demo"; // 1、全局配置 GlobalConfig globalConfig = new GlobalConfig();//构建全局配置对象 String projectPath = System.getProperty("user.dir");// 获取当前用户的目录 globalConfig .setOutputDir(projectPath + "/"+projectName+"/src/main/java")// 输出文件路径 .setAuthor("demo")// 设置作者名字 .setOpen(false)// 是否打开资源管理器 .setFileOverride(true)// 是否覆盖原来生成的 .setIdType(IdType.AUTO)// 主键策略 .setBaseResultMap(true)// 生成resultMap .setBaseColumnList(true)// XML中生成基础列 .setServiceName("%sService");// 生成的service接口名字首字母是否为I,这样设置就没有I // 2、数据源配置 DataSourceConfig dataSourceConfig = new DataSourceConfig();// 创建数据源配置 dataSourceConfig .setUrl("jdbc:mysql://127.0.0.1:3306/demo?userSSL=false&useUnicode=true&characterEncoding=UTF-8&serverTimezone=UTC") .setDriverName("com.mysql.cj.jdbc.Driver") .setUsername("root") .setPassword("root") .setDbType(DbType.MYSQL); // 3、包配置 PackageConfig packageConfig = new PackageConfig(); packageConfig .setParent("com.yiche.demo.druid") .setEntity("entity") .setController("controller") .setService("service") .setMapper("mapper"); // 4、策略配置 StrategyConfig strategyConfig = new StrategyConfig(); strategyConfig .setCapitalMode(true)// 开启全局大写命名 .setInclude("demo")// 设置要映射的表 .setNaming(NamingStrategy.underline_to_camel)// 下划线到驼峰的命名方式 .setColumnNaming(NamingStrategy.underline_to_camel)// 下划线到驼峰的命名方式 .setEntityLombokModel(false)// 是否使用lombok .setRestControllerStyle(true)// 是否开启rest风格 .setControllerMappingHyphenStyle(true);// localhost:8080/hello_a_2 // 5、自定义配置(配置输出xml文件到resources下) InjectionConfig cfg = new InjectionConfig() { @Override public void initMap() { // to do nothing } }; List<FileOutConfig> focList = new ArrayList<>(); String templatePath = "/templates/mapper.xml.vm"; // 自定义配置会被优先输出 focList.add(new FileOutConfig(templatePath) { @Override public String outputFile(TableInfo tableInfo) { // 自定义输出文件名 , 如果你 Entity 设置了前后缀、此处注意 xml 的名称会跟着发生变化!! return projectPath + "/"+projectName+"/src/main/resources/mapper/" + tableInfo.getEntityName() + "Mapper" + StringPool.DOT_XML; } }); cfg.setFileOutConfigList(focList); // 6、整合配置 AutoGenerator autoGenerator = new AutoGenerator();// 构建代码生自动成器对象 autoGenerator .setGlobalConfig(globalConfig)// 将全局配置放到代码生成器对象中 .setDataSource(dataSourceConfig)// 将数据源配置放到代码生成器对象中 .setPackageInfo(packageConfig)// 将包配置放到代码生成器对象中 .setStrategy(strategyConfig)// 将策略配置放到代码生成器对象中 .setCfg(cfg)// 将自定义配置放到代码生成器对象中 .execute();// 执行! } }myabtis-plus 简单的api
生成后的实体需要手动加 TableField 属性(不然会报属性映射的错)
public class Demo implements Serializable { private static final long serialVersionUID = 1L; @TableId(value = "id", type = IdType.AUTO) private Long id; /** * 名称 */ private String name; private Integer age; @TableField(value = "uuid_no") private String uuidNo; @TableField(value = "create_time") private LocalDateTime createTime; @TableField(value = "update_time") private LocalDateTime updateTime; /** * 0 未删除 1 已删除 */ @TableField(value = "delete_flag") private Integer deleteFlag; public Long getId() { return id; } public void setId(Long id) { this.id = id; } public String getName() { return name; } public void setName(String name) { this.name = name; } public Integer getAge() { return age; } public void setAge(Integer age) { this.age = age; } public String getUuidNo() { return uuidNo; } public void setUuidNo(String uuidNo) { this.uuidNo = uuidNo; } public LocalDateTime getCreateTime() { return createTime; } public void setCreateTime(LocalDateTime createTime) { this.createTime = createTime; } public LocalDateTime getUpdateTime() { return updateTime; } public void setUpdateTime(LocalDateTime updateTime) { this.updateTime = updateTime; } public Integer getDeleteFlag() { return deleteFlag; } public void setDeleteFlag(Integer deleteFlag) { this.deleteFlag = deleteFlag; } @Override public String toString() { return "Demo{" + "id=" + id + ", name=" + name + ", age=" + age + ", uuidNo=" + uuidNo + ", createTime=" + createTime + ", updateTime=" + updateTime + ", deleteFlag=" + deleteFlag + "}"; } }简单的api,直接用生成的demoService ,不需要手动写sql
插入:
Demo demo = new Demo(); boolean save = demoService.save(demo);查询:
// 主键查询 Demo demo = demoService.getById(id); // 属性查询 QueryWrapper<Demo> wrapper = new QueryWrapper(); // name是test_1的 wrapper.eq("name", name); Demo demo = demoService.getOne(wrapper);更新:
UpdateWrapper<Demo> wrapper = new UpdateWrapper(); // 构造更新条件,UPDATE demo WHERE name = ? wrapper.eq("name", name); // 要更新的值 Demo demo = new Demo(); demo.setUuidNo(UUID.randomUUID().toString()); boolean update = demoService.update(demo, wrapper);热门文章
- 孕妇被猫抓流血了,会影响胎儿发育吗(孕妇被猫抓流血了,会影响胎儿发育吗视频)
- 1月13日 | Clash Meta每天更新20M/S免费节点订阅链接地址
- Python语法学习之进程池与进程锁详解_python_
- 1月17日 | Clash Meta每天更新20.9M/S免费节点订阅链接地址
- 国内十大猫粮品牌排行榜对比(国内知名猫粮品牌)
- 动物医院实践心得2500字内容怎么写(动物医院实践心得5000)
- 动物打疫苗后的不良反应是什么症状表现(动物打疫苗后的不良反应是什么症状表现图片)
- 宠物美容学校沈阳(沈阳学宠物美容技术大概要多少钱)
- 济南宠物猫领养中心在哪里 济南宠物猫领养中心在哪里啊
- 成都市动物防疫站免费疫苗时间(成都市动物防疫站免费疫苗时间表)